Final Logo Design

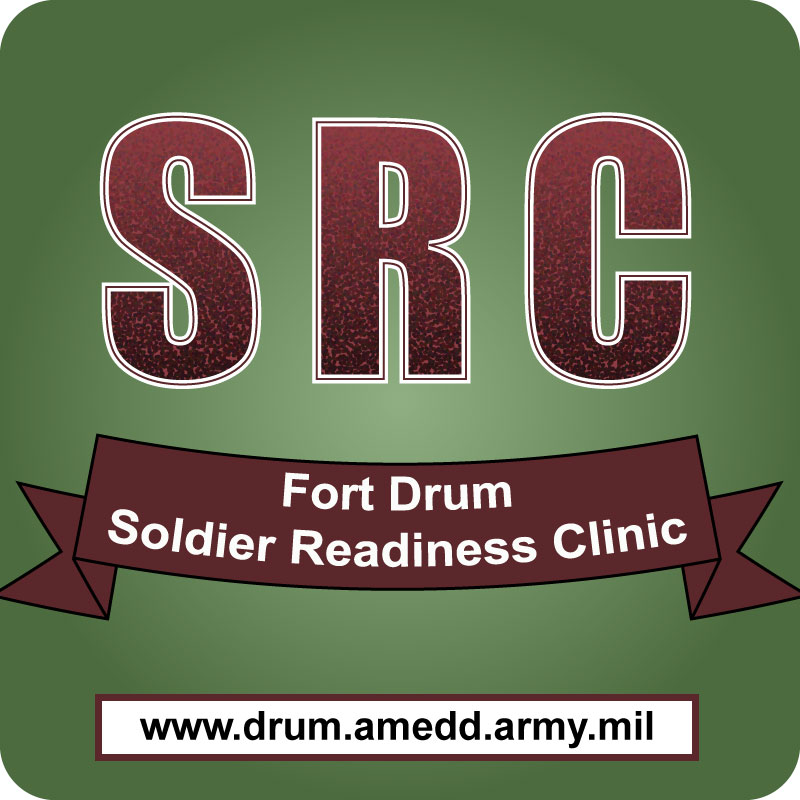
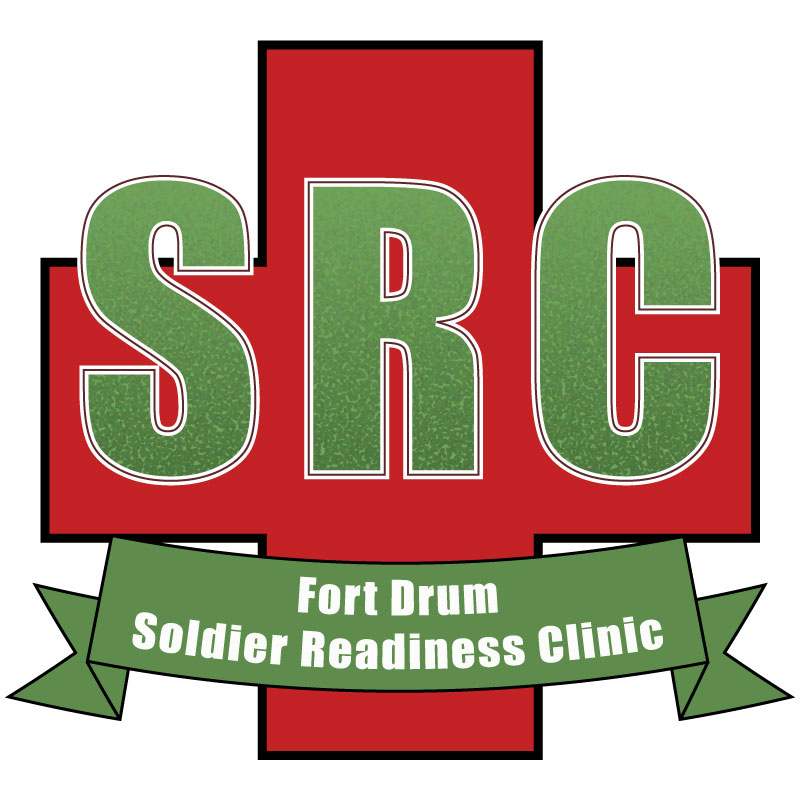
Final SRC Logo Design

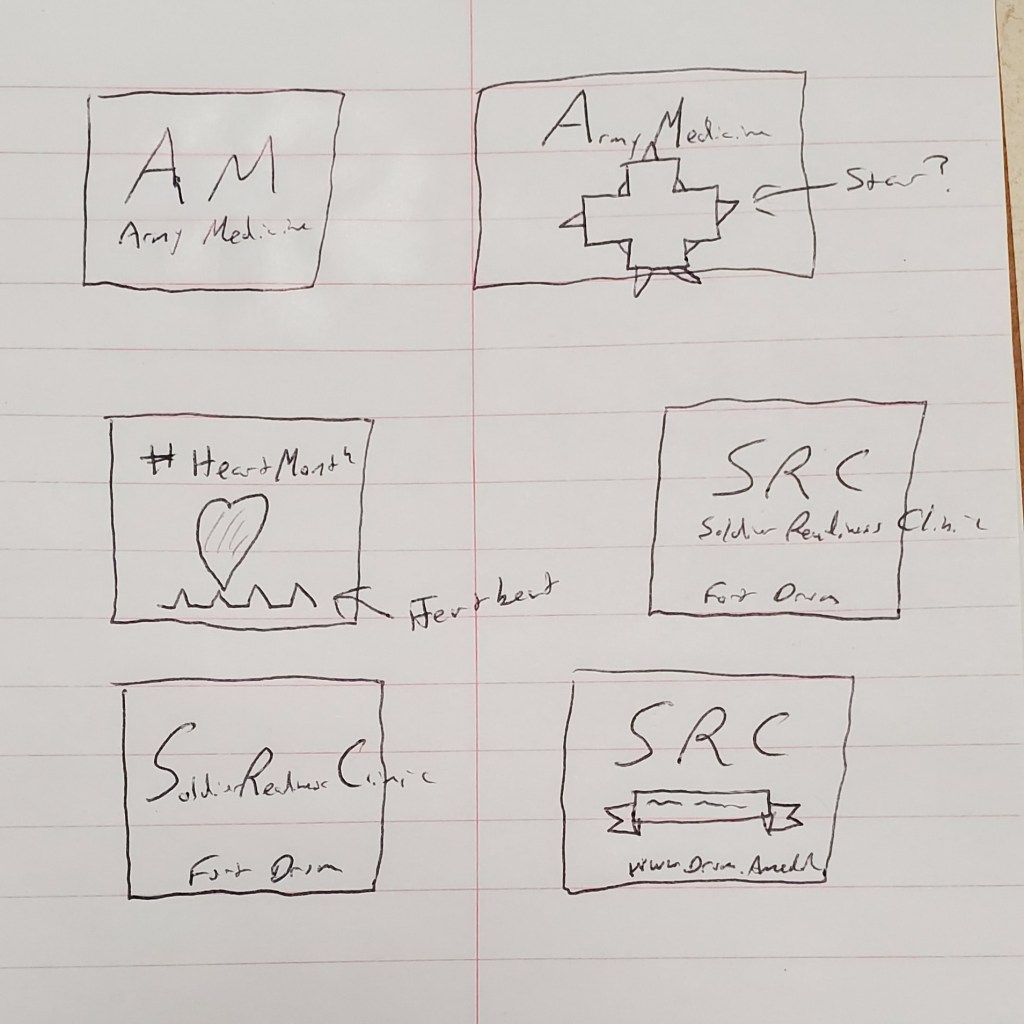
When initially creating my draft logo, I began by sketching some ideas on paper.  Initially, I wanted to create a general Army Medicine logo. Then, it occurred to me Army Medicine already has a logo. Why recreate the wheel. So, I decided to focus on a more specific topic within my organization. After making a few sketches, I decided to make a logo for a department at my clinic which doesn’t have their own logo but is a staple of our installation.

Before deploying and upon returning from deployment, all soldiers must go to the Soldier Readiness Clinic to ensure they are medically ready for the fight. So, working on a logo for the SRC seemed like a step in the right direction.

I started the logo by creating a new Illustrator document at 800 x 800 pixels. I then made a couple of color swatches based on the colors of our already branded material from my clinic (a specific red and green).

I then used the green to create a background with rounded edges. I then copied the background and used the gradient tool to create a radial gradient on the copy and lowered the opacity to 30% to give the green background a shadowy look.  Next, I created the SRC portion of the logo using the Bauhaus 93 font at 325 pt.

After working through the design a little bit, I decided to change the font to Impact as I believe it gave the design a little more of a professional look. Next, I used what I learned in the Varsity Lettering tutorial to create a pointalized gradient effect in the lettering. Next, I added a white stroke and made it 9 pt.; then I added a second stroke and made it 2 pt to give it a border within a border look.

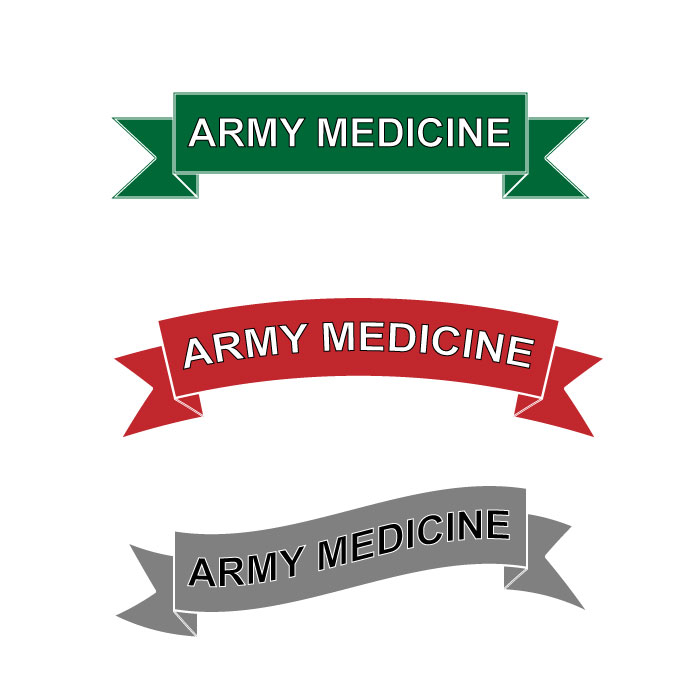
Next, I began working on the spelled-out portion of Soldier Readiness Clinic. I took what I learned from the banner tutorial and made a banner using the red swatch I created as a background and having a black border at 3 pt.  I then chose Arial Bold as the font and used 47 pt. weight.

Finally, I copied the banner and moved it down to the bottom. I then changed the fill to white and the stroke to the red swatch and changed the words to “Fort Drum, New York.” After ensuring the entire thing was grouped, I scaled the size down a bit and put an arch on the banner at -25%.

After finalizing my logo, I realized I might want to go in a different direction.  So, I decided to save this logo as DRAFT1 and make some changes. I got rid of the lower banner and replaced it with a rectangle box of the same color with the web address in it. I also scaled up the vertical size of the upper banner and put the words “Fort Drum” on top of “Soldier Readiness Clinic” and added a -15% arch to that banner.

My draft assignment now had two similar products with some slight differences. 

Next came completing my final design.  After reading through some of the suggestions from my feedback, I realized I might be making my design a little too complicated.  Some of the suggestions I received which I wanted to incorporate in my final design were to include a heart logo, including a medical cross, to get rid of some of the words, making the color of the wording the same as the SRC, removing one of the banners, and trying to think about the effectiveness of my logo on something as small as a patch or t-shirt.

With my feedback in mind, the first thing I decided to do when editing my design was to get rid of the background completely.  I then changed the color of the text and banner from my clinic’s branded red to our branded green.

The next step was to make something to complement the SRC text.  Being that the SRC is a medical clinic, I went with the standard Red Cross as a background.  I used the rectangle tool to create the first part of the red cross.  I then copied the shape, rotated it 90 degrees and placed it in the center of the other shape.  I then used the shape builder tool to merge the two rectangles to finalize the red cross. 

I then put a 9-pt. border on the cross to help separate it from the text and made the SRC text larger (307 pt.) to make it fill the space a little more.  Finally, I put a slight arch on the banner to make the logo look a little less “boxy.”  
Draft Logo

SRC Logo Draft 1
SRC Logo Draft 2

When creating my draft logo, I struggled a little bit more than I did when using Photoshop to create my graphic design project.  I have a lot of experience using Photoshop, specifically with touching up photos, but I have zero experience with Illustrator.  While I think the tutorials were fun and gave me a good understanding of how to use Illustrator, the topics covered in the tutorials didn’t do much to help me come up with a good idea for a logo.

When I began to sketch some ideas (as noted in the sketch photo above), I started working toward making a general Army Medicine logo.  Then, it occurred to me; Army Medicine already has a logo.  Why recreate the wheel. So, I decided to focus on a more specific topic within my organization. Being that February is Heart Health Month, I began to work on a plan to create a logo for Heart Health Month.  Still, again, I realized there were already a lot of branded things out there for that (plus making a heart in Illustrator seemed a little beyond my expertise at this point). 

I next decided to work on a logo for a department at my clinic which doesn’t have their own logo but is a staple of our installation.  Before deploying and upon returning from deployment, all Soldiers must go to the Soldier Readiness Clinic to ensure they are medically ready for the fight.  So, working on a logo for the SRC seemed like a step in the right direction.

I began creating my logo by creating a new Illustrator document at 800 x 800 pixels.  I then made a couple of color swatches based on the colors of our already branded material from my clinic (a specific red and green).

I then used the green to create a background with rounded edges.  I then copied the background and used the gradient tool to create a radial gradient on the copy and lowered the opacity to 30% to give the green background a shadowy look. 

Next, I created the SRC portion of the logo. I began by using the Bauhaus 93 font at 325 pt.

After working through the design a little bit, I decided to change the font to Impact as I believe it gave the design a little more of a professional look.  Next, I used what I learned in the Varsity Lettering tutorial to create a pointalized gradient effect in the lettering.  Next, I added a white stroke and made it 9 pt.; then I added a second stroke and made it 2 pt to give it a border within a border look.

Next, I began working on the spelled-out portion of Soldier Readiness Clinic.  I took what I learned from the banner tutorial and made a banner using the red swatch I created as a background and having a black border at 3 pt.

I then chose Arial Bold as the font and used 47 pt. weight. 

Finally, I copied the banner and moved it down to the bottom.  I then changed the fill to white and the stroke to the red swatch and changed the words to “Fort Drum, New York.” After ensuring the entire thing was grouped, I scaled the size down a bit and put an arch on the banner at -25%. 

After finalizing my logo, I realized there might be a different direction I might want to go with.

So, I decided to save this logo as DRAFT1 and make some changes.  I got rid of the lower banner and replaced it with a rectangle box of the same color with the web address in it.  I also scaled up the vertical size of the upper banner and put the words “Fort Drum” on top of “Soldier Readiness Clinic” and added a -15% arch to that banner. 

All in all, I’m not sure which banner I would go with for my final design. That’s where I’m hoping feedback will help.  Looking at my draft designs, I can tell they’re not where I want them to be, but I’m not sure where to go from here.  I can use all the help I can get; so, please feel free to give me as much feedback and criticism as possible. 

Final Graphic Design Project

For my project, I decided to provide some information about how to combat
the flu this season. Given that my topic is Army Medicine, and with the flu
being so prevalent in the news lately, I figured this would be an excellent way
to share an important topic with my audience. It’s designed to be informative
while not being filled with so much information the reader loses
interest.  

I wanted my initial draft to be simple while at the same time attracting the
reader’s attention. I drew my information directly from the CDC website on the
three tips to help combat the flu, which can be found here: https://www.cdc.gov/flu/prevent/prevention.htm.

The three photos are public domain photos downloaded from the Defense Visual
Information Distribution Service (DVIDS) and depict an Amy Soldier or medical
professional (two of the photos are mine I took for work). The text boxes with
the steps are matched up with the picture beside it to ensure both work
together. For all three photos, I utilized a border following the same steps in
the cutouts and blending modes Photoshop tutorial. I opened each photo
individually, added a new layer, used the paint bucket to fill in the layer
black, used stroke in the layer style box and changed the size to meet the
needs, changed fill to 0%, and saved the photos as JPGs before using place
embedded to add them to my design.

Next, I used the Transform – Rotate tool in the edit menu to tilt each photo
slightly. I also included a drop shadow from the layer style box on each photo.
For my background, I decided to use a simple design from Pixabay.com, which is
free for commercial use and no attribution required. I needed a background
where all the elements would work on top of without flushing anything out.

For the logos, I used the official Army Medicine logo on the top and on the
bottom right a design I made, which incorporates the 10th Mountain Division
Patch, the Fort Drum Medical Activity Logo, and the Army Medical Command Patch.
Each element was used to help with the branding of the design. I also included
a link to our webpage as well as a hashtag others can use when sharing.

When designing the text, I went through a few different ideas before landing
on one I felt was visually appealing while at the same time easy to read. I
changed sizes, type and weight until I came up with the right design that would
pop and be readable. For the top line of text, I also added a drop shadow using
the layer style box. All drop shadows use global light so they all match in
direction.

Throughout the entire process of my draft design, I used the move tool to
shape and resize the images and text to ensure they fit on the page
logically. 

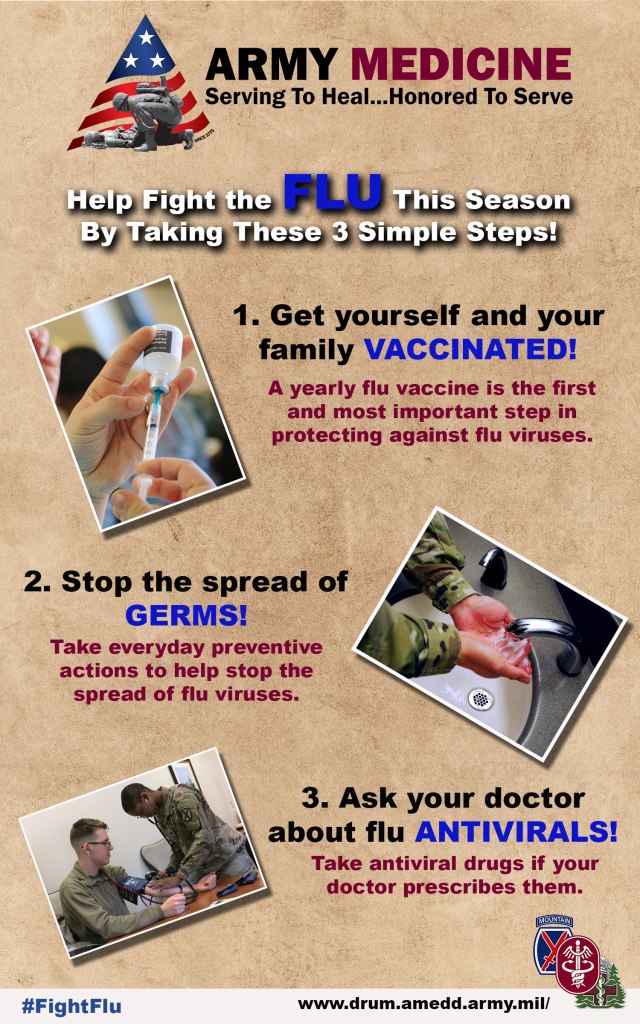
When working on my final draft, I incorporated some ideas I received as
feedback from my classmates.  First, it
was recommended I number my tips so they flow logically, which I incorporated
into my final design.  Next, I received
feedback that it would look good if I used some push-pin graphics to make the
photos look like they were pinned to the background.  However, I tried that and it looked a bit
tacky (see what I did there?).  Seriously
though, it didn’t look as good as I thought it would, so I decided not to use
that idea.

Some other changes I made based on feedback was to use a lighter color which
had some more contrast with the background for the word FLU, which I changed to
the same blue color I used in the highlighted words in the steps and I
capitalized “the” on the top line to make it consistent with the rest of the
text.  After that, I had my final
design.  I want to target Soldiers and
their families with this design. While it’s a requirement for Soldiers to get a
flu shot every year, it’s not for their family members. I wanted to design a
product that would be easily understandable to anyone reading it while at the
same time grabbing their attention. 

Thank you for taking a look and I hope you enjoy.


Photo and Graphic Credits:

“Army Medicine Graphic”, courtesy graphic, public use. https://armymedicine.health.mil/

“Army Medics” , by Warren W. Wright Jr., Fort Drum Medical Activity, public
use. https://www.dvidshub.net/image/5283702/fort-drum-nurses-medics-get-hands-during-nursing-skills-fair

“Fort Drum MEDDAC 3 Patch”, design by Warren W. Wright Jr., Fort Drum
Medical Activity, public use.

“Hand Washing Photo”, courtesy photo, 21st Space Wing, public
use. https://www.dvidshub.net/image/5761746/support-mission-wash-your-hands

“Paper, Old Texture”, by Chris Fiedler, Pixabay, free for commercial use. https://pixabay.com/photos/paper-old-texture-parchment-1074131/

 “Syringe Photo”, by Warren W. Wright Jr., Fort Drum Medical Activity,
public use. https://www.dvidshub.net/image/5283711/fort-drum-nurses-medics-get-hands-during-nursing-skills-fair


Draft Graphic Design Project

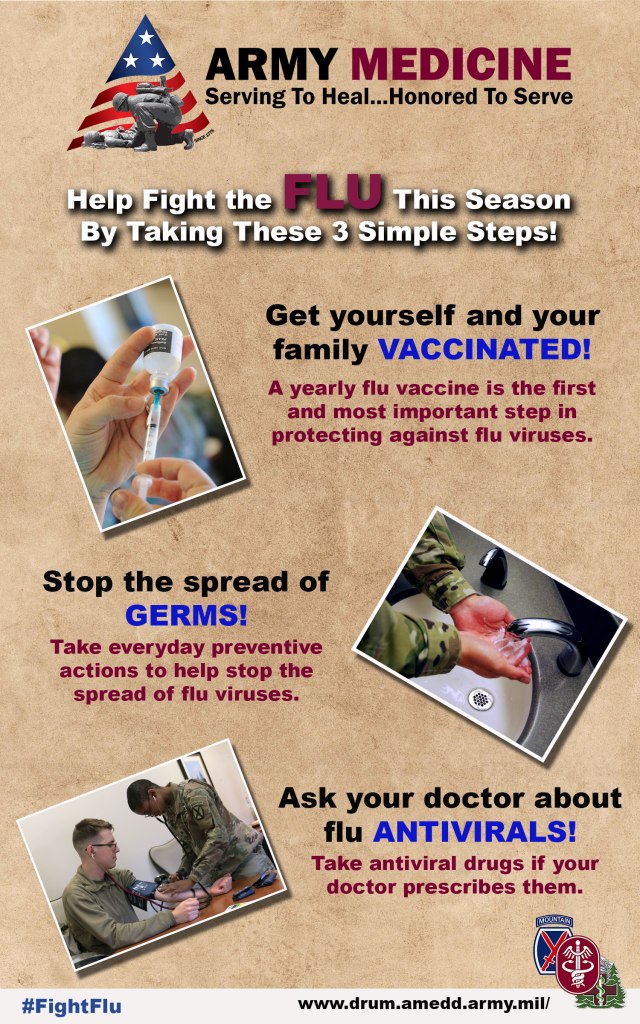
For my design, I decided to provide some information about how to combat the flu this season. Given that my topic is Army Medicine, and with the flu being so prevalent in the news lately, I figured this would be an excellent way to share an important topic with my audience. It’s designed to be informative while not being filled with so much information the reader loses interest.  

I wanted my design to be simple while at the same time attracting the reader’s attention. I drew my information directly from the CDC website on the three tips to help combat the flu, which can be found here: https://www.cdc.gov/flu/prevent/prevention.htm.

The three photos are public domain photos downloaded from the Defense Visual Information Distribution Service (DVIDS) and depict an Amy Soldier or medical professional (two of the photos are mine I took for work). The text boxes with the steps are matched up with the picture beside it to ensure both work together. For all three photos, I utilized a border following the same steps in the cutouts and blending modes Photoshop tutorial. I opened each photo individually, added a new layer, used the paint bucket to fill in the layer black, used stroke in the layer style box and changed the size to meet the needs, changed fill to 0%, and saved the photos as JPGs before using place embedded to add them to my design.

Next, I used the Transform – Rotate tool in the edit menu to tilt each photo slightly. I also included a drop shadow from the layer style box on each photo. For my background, I decided to use a simple design from Pixabay.com, which is free for commercial use and no attribution required. I needed a background where all the elements would work on top of without flushing anything out.

For the logos, I used the official Army Medicine logo on the top and on the bottom right a design I made, which incorporates the 10th Mountain Division Patch, the Fort Drum Medical Activity Logo, and the Army Medical Command Patch. Each element was used to help with the branding of the design. I also included a link to our webpage as well as a hashtag others can use when sharing.

When designing the text, I went through a few different ideas before landing on one I felt was visually appealing while at the same time easy to read. I changed sizes, type and weight until I came up with the right design that would pop and be readable. For the top line of text, I also added a drop shadow using the layer style box. All drop shadows use global light so they all match in direction.

Throughout the entire process, I used the move tool to shape and resize the images and text to ensure they fit on the page logically. 

For this design, I wanted to target Soldiers and their families. While it’s a requirement for Soldiers to get a flu shot every year, it’s not for their family members. I wanted to design a product that would be easily understandable to anyone reading it while at the same time grabbing their attention. 

Photo and Graphic Credits:

“Army Medicine Graphic”, courtesy graphic, public use. https://armymedicine.health.mil/

“Army Medics” , by Warren W. Wright Jr., Fort Drum Medical Activity, public use. https://www.dvidshub.net/image/5283702/fort-drum-nurses-medics-get-hands-during-nursing-skills-fair

“Fort Drum MEDDAC 3 Patch”, design by Warren W. Wright Jr., Fort Drum Medical Activity, public use.

“Hand Washing Photo”, courtesy photo, 21st Space Wing, public use. https://www.dvidshub.net/image/5761746/support-mission-wash-your-hands

“Paper, Old Texture”, by Chris Fiedler, Pixabay, free for commercial use. https://pixabay.com/photos/paper-old-texture-parchment-1074131/

 “Syringe Photo”, by Warren W. Wright Jr., Fort Drum Medical Activity, public use. https://www.dvidshub.net/image/5283711/fort-drum-nurses-medics-get-hands-during-nursing-skills-fair

An Introduction to Army Medicine

Military healthcare, more specifically, Army Medicine, is a unique aspect of the healthcare field. Not only does Army medicine focus on the standard, everyday healthcare practices one would find in the civilian sector, but it also includes an abundance of specialized healthcare practices. These practices range from combat casualty care and training non-medical Soldiers to treat battlefield wounds to maintaining the medical readiness of the force, ensuring each and every Soldier is medically ready to complete their mission, regardless of where in the world they may find themselves.


For that reason, I have chosen to focus on Army medicine as my topic for this semester. Army medicine is near and dear to my heart because I served 14 years on active duty, and I also work in an Army ambulatory healthcare clinic as a public affairs officer in Fort Drum, New York.


Focusing on Army medicine this semester will allow me to develop new and exciting products for my clinic while learning how to think outside the box when it comes to the development of communication products. It will also allow me to highlight some of the outstanding medical professionals who are dedicated to the health and wellbeing of our Soldiers, their family members, and Army retirees of our tiny North Country, New York community.


Army medicine employs a diverse group of healthcare professionals, including general practice doctors, specialty care doctors, nurse practitioners, certified nurse midwives, combat medics, dental specialists, and even veterinary specialists, to name a few.


Luckily, photographs and other media taken for the use of government communications by government employees are considered to be public domain. Therefore, any media I either develop or acquire for the purpose of this course will not be copyrighted material and won’t require me to obtain permission before use. Besides, I already produced plenty of material I can work from, such as the photos below.

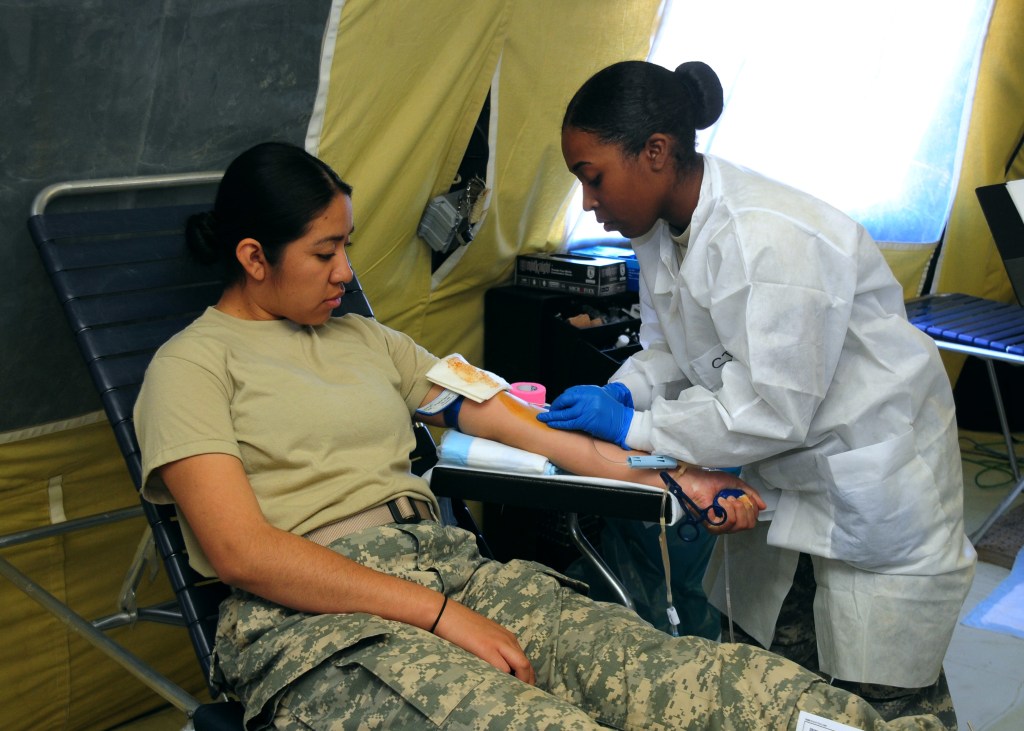
Spc. Susan Edwards-Seales (right), a medical laboratory technician with the 212th Combat Support Hospital, 30th Medical Brigade, 21st Theater Sustainment Command, and a native of Kansas City, prepares Pfc. Jennifer Ramirez (left), a medic with the 212th CSH and a native of San Diego, to have her blood taken during a blood drive conducted by the 212th CSH at the Miesau Army Depot April 21. The blood drive was the final portion of the 212th CSH’s more than weeklong multinational live exercise, or LIVEX, where the unit constructed a fully functional field hospital and performed various exercises and live procedures in order to practice operating in a field environment. (Photo by Staff Sgt. Warren W. Wright Jr., 21st Theater Sustainment Command)
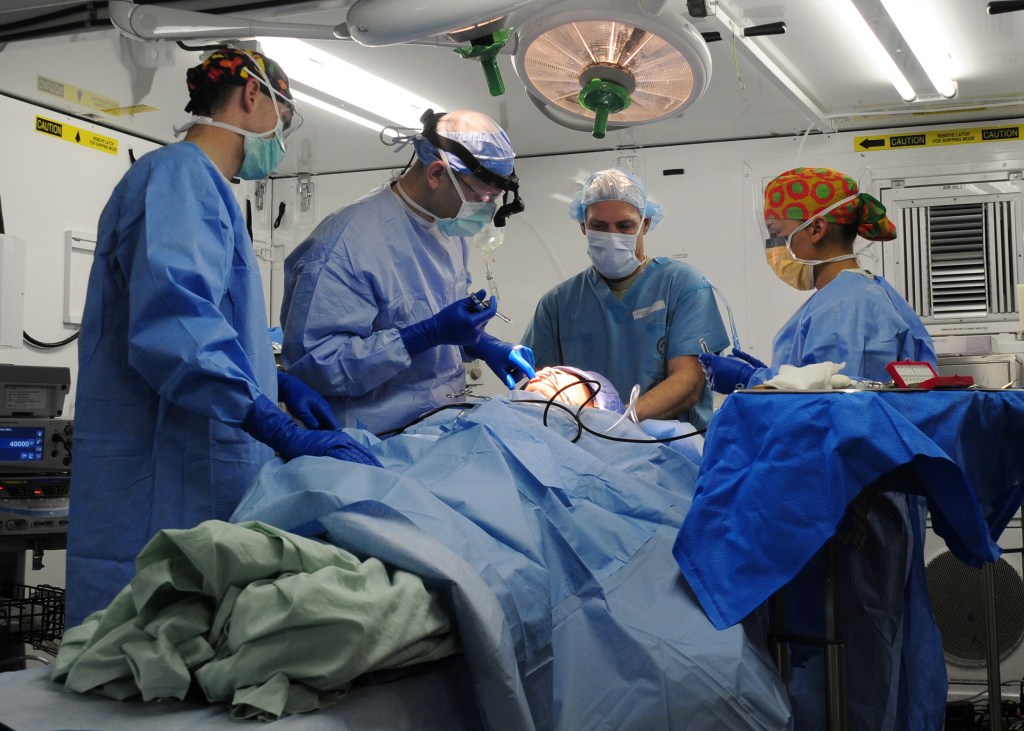
Medical professionals from the 212th Combat Support Hospital, 30th Medical Brigade, 21st Theater Sustainment Command, conduct a live wisdom tooth extraction during a live exercise, or LIVEX, at the Miesau Army Depot April 20. Patients volunteered to conduct their surgeries in the field so that Soldiers from the 212th CSH could practice performing medical procedures in a field environment. (Photo by Staff Sgt. Warren W. Wright Jr., 21st Theater Sustainment Command)
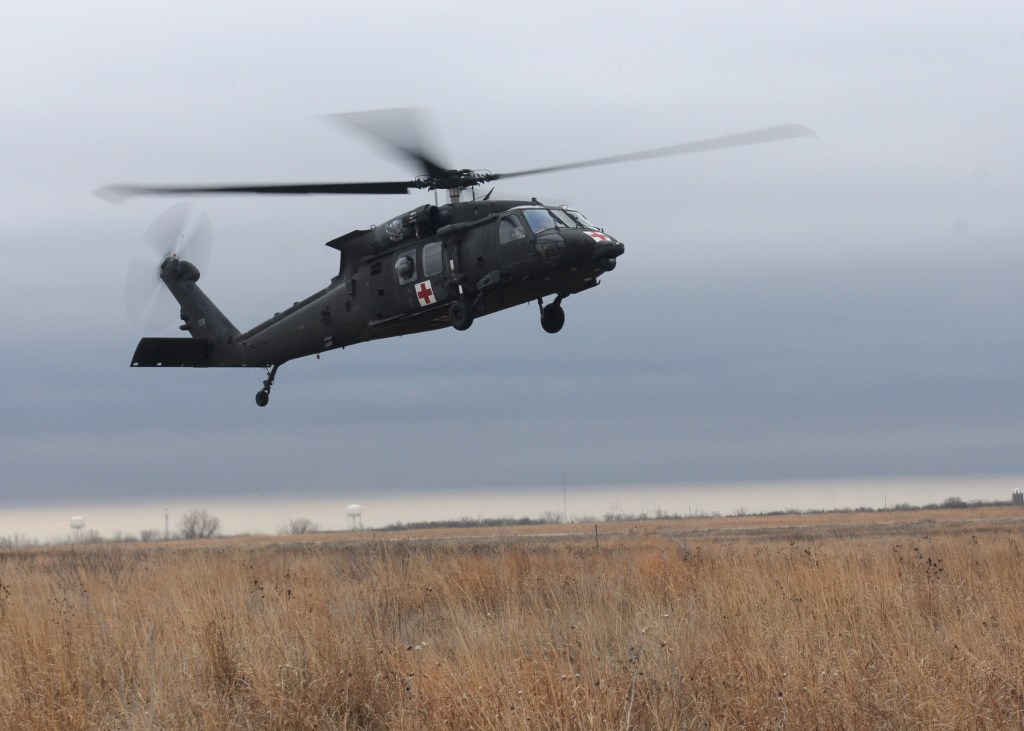
Medics with Company C., 101st Brigade Support Battalion, 1st Armored Brigade Combat Team, 1st Infantry Division, practice using various hoists to lift casualties out of areas where helicopters cannot safely land during medical evacuation training at Fort Riley, Kan. March 8. The medics, with the support of the 2nd General Support Aviation Battalion, 1st Combat Aviation Brigade, 1st Inf. Div., used both a “Skedco Sked” basic rescue system and a rescue seat to evacuate simulated patients as the helicopter hovered about 50 feet off the ground. (Photo by Staff Sgt. Warren W. Wright Jr., 1st ABCT)
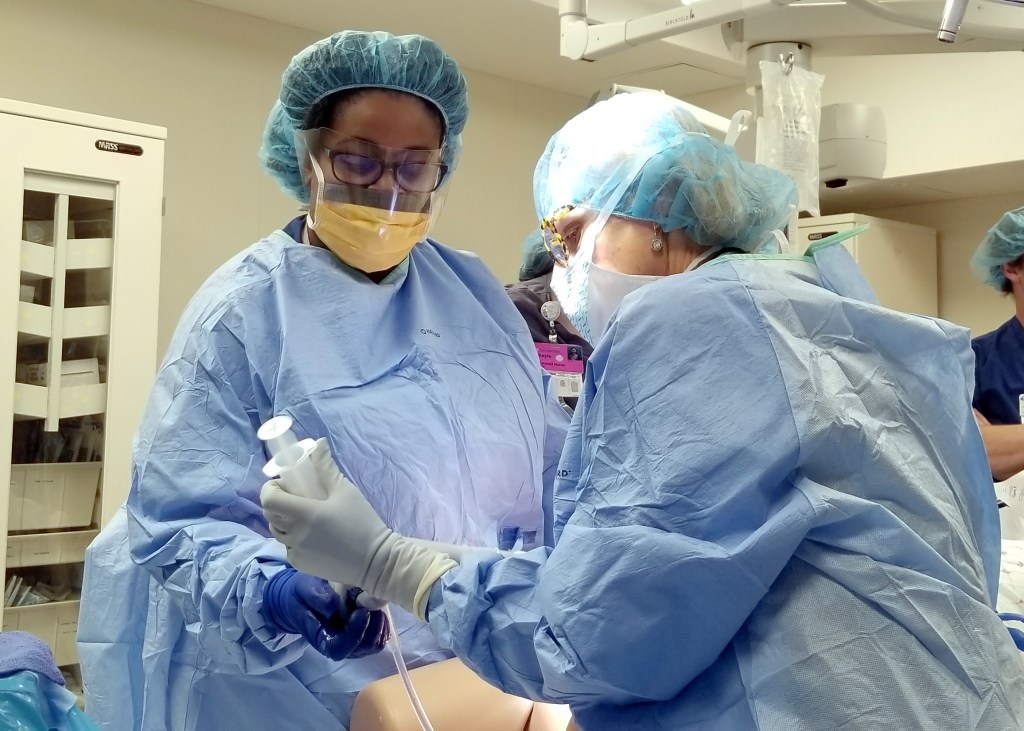
WATERTOWN, N.Y. – Capt. Heather Irobunda (left), an obstetrics physician with the U.S. Army Medical Department Activity, Fort Drum, N.Y., works with a labor and delivery nurse from the Samaritan Medical Center to control the bleeding of a simulated patient during an emergency preparedness training scenario in Watertown, N.Y. June 7. Obstetrics and gynecology health care professionals from Fort Drum work side by side with their civilian counterparts at Samaritan to provide pregnancy, labor and delivery care to Fort Drum service members and their families. (Photo by Warren W. Wright Jr., Fort Drum MEDDAC Public Affairs)
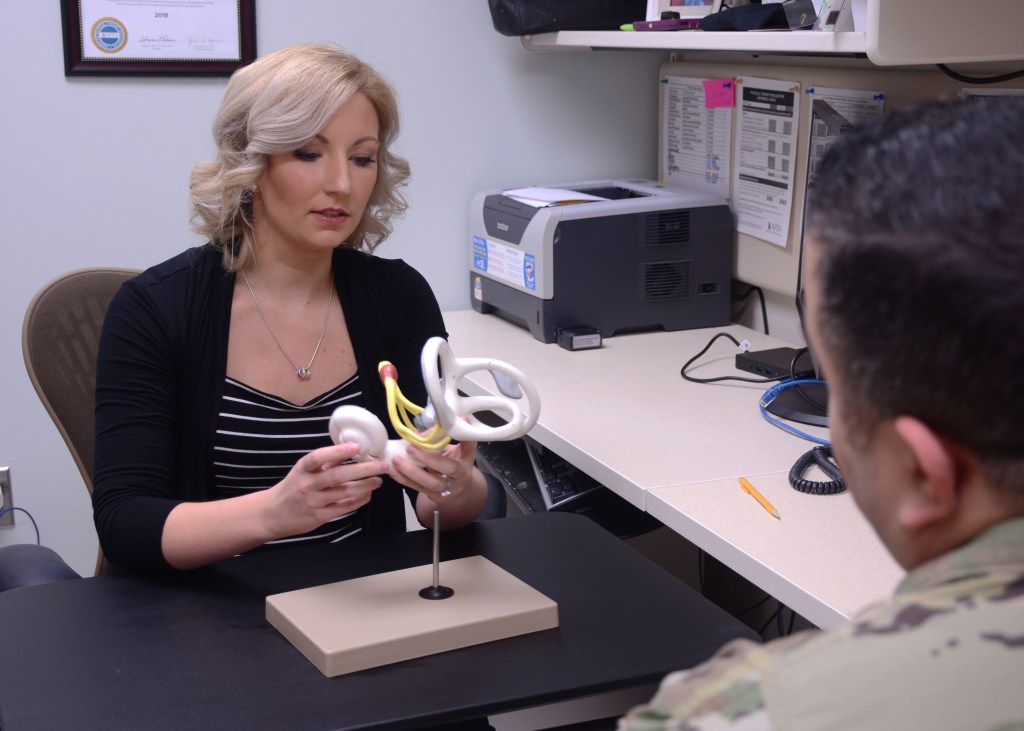
FORT DRUM, N.Y. – Elizabeth Kirkpatrick, the physical therapist for the Fort Drum Traumatic Brain Injury (TBI) Clinic, uses a model of the inner ear to demonstrate how a concussion can cause inner ear, or vestibular, damage which may result in dizziness, anxiety, depression, moodiness, balance problems and irritability to name a few. Healthcare professionals at the Fort Drum TBI Clinic provide comprehensive multidisciplinary strategies to help facilitate the rehabilitation and reintegration of service members who’ve suffered from a TBI. (Photo by Warren W. Wright Jr., Fort Drum MEDDAC Public Affairs)
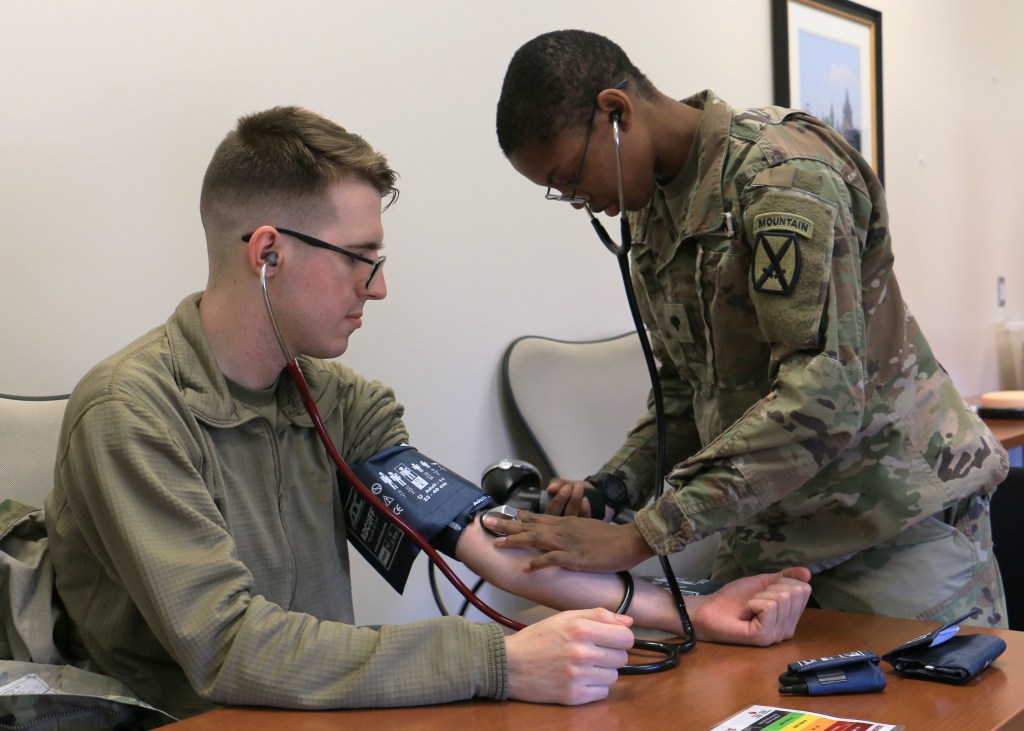
FORT DRUM, N.Y. – Spc. Natassja Blount (right), a healthcare specialist with the 7th Brigade Engineer Battalion, 1st Brigade Combat Team, 10th Mountain Division (Light Infantry), and a native of Little Rock, Ark., uses a manual blood pressure cuff to obtain blood pressure from Pfc. Drough Deguire (left), a healthcare specialist from the Fort Drum Medical Activity (MEDDAC) and a native of Temple, Texas, during the MEDDAC Nursing Skills Fair at the Bowe Troop Medical Clinic on Fort Drum, N.Y. April 17. (Photo by Warren W. Wright Jr., Fort Drum MEDDAC Public Affairs)
Create your own website, free on WordPress.com.Create your own website.
Start free